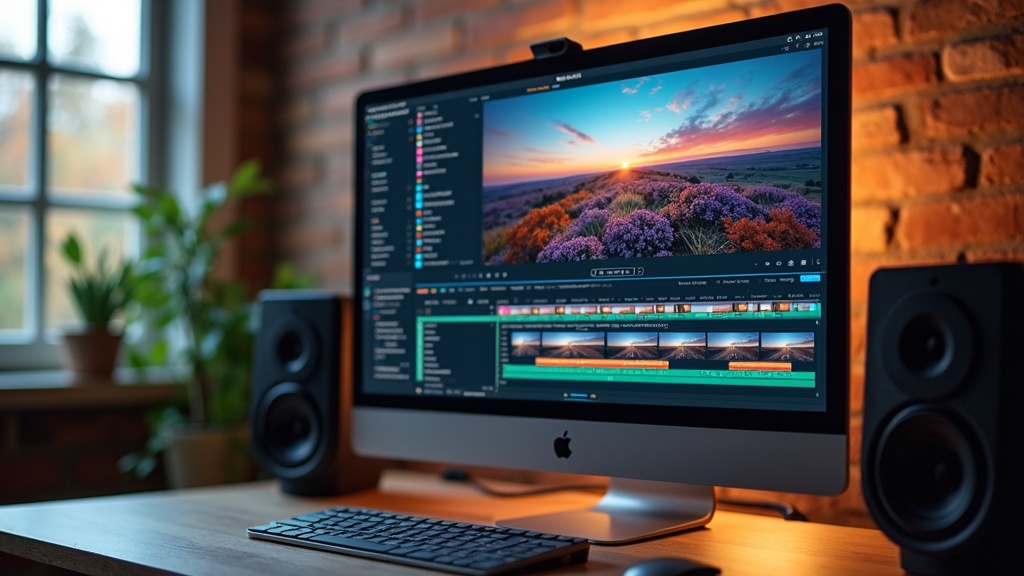
Color Grading Techniques For Vloggers
Color grading has a huge influence on the mood and look of vlogs. With all the cameras, lighting, and editing tools available these days, creating a unique visual style is totally within reach, even if you’re just starting out. I’m breaking down the basics and sharing some practical approaches for vloggers who want vivid, professional-looking videos without getting lost in technical jargon.
Why Color Grading Matters for Vloggers
Color grading makes a video pop, helps set the mood, and draws viewers in. Viewers might not always notice subtle tweaks, but that little extra polish can mean a lot when you’re competing for attention on YouTube or Instagram. The right color choices can make your audience feel relaxed, motivated, or curious—whatever vibe you’re aiming for in your vlog. Even tweaks like fixing white balance or boosting contrast can take a vlog from amateurish to attention-grabbing.
If you’ve ever watched a travel vlogger show crystal-blue oceans, warm golden sunsets, or moody city nights, chances are color grading did a lot of the heavy lifting. Vloggers use grading to step up the story, build a brand look, or just give content a little personal flair. For anyone looking to grow a channel or keep viewers coming back, learning some simple color grading tricks is pretty handy.
Understand the Basics of Color Grading
Color grading is the art of adjusting the colors of your footage to make everything look cohesive or to give it a certain style. Before going deep, here are a few basic terms you’ll hear tossed around a lot:
- White Balance: Makes sure colors look natural by correcting for the light source. Without it, a white shirt might look orange or blue depending on the lighting.
- Saturation: Controls how vivid or muted colors appear. More saturation = bold, less = subtle or vintage looks.
- Contrast: The difference between dark and light parts of the frame. Boosting contrast makes everything look punchier.
- LUT (LookUp Table): A preset filter that quickly changes the overall style or mood of footage.
Grading isn’t the same as color correction; though, they do overlap. Correction fixes basic issues like weird skin tones or off-color backgrounds, while grading adds the creative touch that makes a vlog stand out.
How to Get Started With Color Grading
Getting into grading can feel intimidating at first, especially if your editing software throws dozens of sliders and wheels your way. Here’s a straightforward plan to get comfortable:
- Use Your Editing Software’s Basic Tools: Most editing programs (like Adobe Premiere Pro, DaVinci Resolve, and Final Cut Pro) offer builtin color grading tools. Play with sliders for exposure, temperature, tint, and saturation.
- Start With a LUT: Download a free or budgetfriendly LUT and apply it to some clips. LUTs are great for beginners because you can see dramatic style changes with one click, then fine-tune from there.
- Fix White Balance First: Always set your whites correctly before getting creative. This keeps colors natural, especially for skin tones or product shots.
- Adjust Exposure: Make sure nothing is too dark or too bright. Dial this in before tweaking colors or contrast for better control.
- Test Different Looks: Compare your original video to a few graded versions. Sometimes, a muted cinematic palette works best; other times, bright and saturated gives a vlog way more energy.
Lighting and camera settings matter a ton, too. Try to film with manual white balance and flat profiles (like Canon’s CLog or Sony’s SLog), which make grading much easier in post.
Popular Color Grading Styles for Vloggers
Vloggers aren’t locked into one particular style. Picking a style that matches your channel or mood makes your videos more memorable. These are some crowd favorites:
- Cinematic Teal and Orange: Classic look with warm skin tones and blueish shadows. This style grabs attention and works well for travel or adventure vlogs.
- Moody and Desaturated: Pulls down saturation and raises contrast, useful for storydriven or dramatic scenes. It’s big with daily vloggers who want a more personal, documentary vibe.
- HighKey, Vibrant Looks: Bright, colorful, and cheerful, perfect for lifestyle, family, or comedy vlogs. Popping the reds and greens gives everything a fun, energetic glow.
- Film Emulation: Mimic the look of old film stocks for a retro or nostalgic feel. Lots of LUTs do this instantly. Great for flashbacks or throwback content.
Test a few and stick to those that fit your brand or subject best. A little consistency will make your vlogs instantly recognizable in someone’s feed.
Key Color Grading Tools and How to Use Them
Every editing tool has different bells and whistles, but you’ll run into a few common features:
- Color Wheels: Adjust the hue and brightness of shadows, midtones, and highlights. For example, you can add more blue to the shadows for a cool vibe, or push warm tones into the highlights.
- Curves: Finetune contrast and individual color channels (Red, Green, Blue). Great for shaping the overall look if you want something custom.
- Hue/Saturation: Focus on specific colors; make blues stand out for oceans or mute reds if skin tones look too intense.
- Scopes and Monitors: Tools like vectorscopes and waveforms help you check how your grade looks across different devices by showing important info about brightness and color balance.
If you’re just getting comfortable, working with basic sliders before jumping into curves or color wheels makes things far less overwhelming. Plenty of tutorials on YouTube walk you through these tools with real-life footage.
Common Color Grading Challenges and How to Handle Them
Color grading doesn’t always go smoothly, especially if footage is shot in tricky lighting or with different cameras. Here are a few things I’ve dealt with that you might face too:
- Mismatched Cameras or Lighting: Combining video from different cameras can lead to inconsistent colors. To fix this, start with basic correction to match exposure and white balance before grading everything at once.
- Overdone Looks: Too much color grading can turn skin tones weird, leave footage looking artificial, or add noise. Go easy at first and check your edit on both a phone and a computer before publishing.
- Poorly Lit Footage: No amount of grading can fix footage that’s way too dark or blown out. Whenever possible, light your scene evenly and shoot in a flat picture profile to preserve detail for editing.
Lighting and Shooting Tips for Better Color Grading
Getting footage right incamera is super important. I recommend:
- Using natural light by filming near windows or outdoors
- Avoiding harsh, mixedcolor lighting (like lamps with different bulbs)
- Setting your white balance manually
These steps ensure smoother color in editing and make your grading workflow way faster.
Stick With Your Look
Finding a color grade you love and sticking with it helps with channel branding. Save your grade as a preset in your editing software. Next time, just apply it to your footage, then tweak as needed; saves time and keeps all your vlogs looking sharp and unified.
RealLife Examples
Vloggers around the world use grading to create distinct looks, from moody coffee shop sitdowns to vibrant travel adventures. For instance, Peter McKinnon’s vlogs are famous for their cool, cinematic colors, while creators like Matti Haapoja blend teal and orange for energetic urban stories. Watching how these creators use grading in different environments offers tons of inspiration for your own edits.
- Broll of forests can be made extra lush with greenheavy grades
- Sunset drone shots stand out with subtle boosts to orange and blue hues
Even small vlogs benefit. Cooking channels brighten warm tones to make food more appetizing, and gaming vlogs sometimes tone down colors for a more focused, chill vibe.
Collaborating with fellow creators is becoming a popular way for new vloggers to step up their visuals. Some groups share grading presets and compare their styles, which leads to creative growth. If you want to try teaming up, check in on social platforms for open groups or grading challenges.
Frequently Asked Questions
Most vloggers have a few things they’re curious about when jumping into color grading. Here are some quick answers:
Question: What software should I use for color grading as a beginner?
Answer: DaVinci Resolve offers a free version packed with grading tools. Adobe Premiere Pro and Final Cut Pro are solid picks too and have plenty of guides online for beginners.
Question: Do I have to grade every single vlog?
Answer: Not necessarily. Start by grading videos that matter most (like montages or key episodes), then build workflow habits from there.
Question: How do I avoid weirdlooking skin tones?
Answer: Always nail white balance incamera, then avoid heavyhanded grading on reds, oranges, and yellows in editing. Use reference monitors when you can.
Bringing It All Together
Color grading is more than a technical chore; it’s a creative way to give a boost to your brand, tell a better story, and wow your viewers. Once you pick up the basics and try a few looks, you’ll start to spot what works for your channel. If you film with grading in mind, shoot flat, and experiment a bit with style, every vlog gets a little closer to that polished, scrollstopping look.
Stay curious, watch what other creators are doing, and don’t be afraid to make bold choices with your colors. You’ll get faster the more you try, and your vlogs will have the kind of visual style that viewers remember.
Mib Painter GPT
I help ideate and visualize Mib designs.

