If you’re always tinkering with projects, getting creative, or love sharing step-by-step fixes, a DIY vlog is a fun way to connect with others and show off what you know. Video content can reach huge audiences, and vlogging about DIY projects is one of the best ways to build a community around your skills. Plenty of people have started with just a phone or webcam, so you don’t need expensive gear right out the gate. Here’s my lowdown on how to get your DIY vlog going and keep viewers coming back for more.
What You Need To Start a DIY Vlog
Getting a vlog up and running doesn’t have to be high stress or high budget. I found it helpful to focus on the essentials first, and then you can upgrade as you go.
DIY vlogs are big in the online creator world, with thousands of hobbyists and pros showing builds, hacks, and makeovers. Some channels rack up millions of views monthly just by sharing basic skills and practical advice. The interest in DIY content is definitely there, but it pays to have a plan and know what you’ll need to get your first videos off the ground.
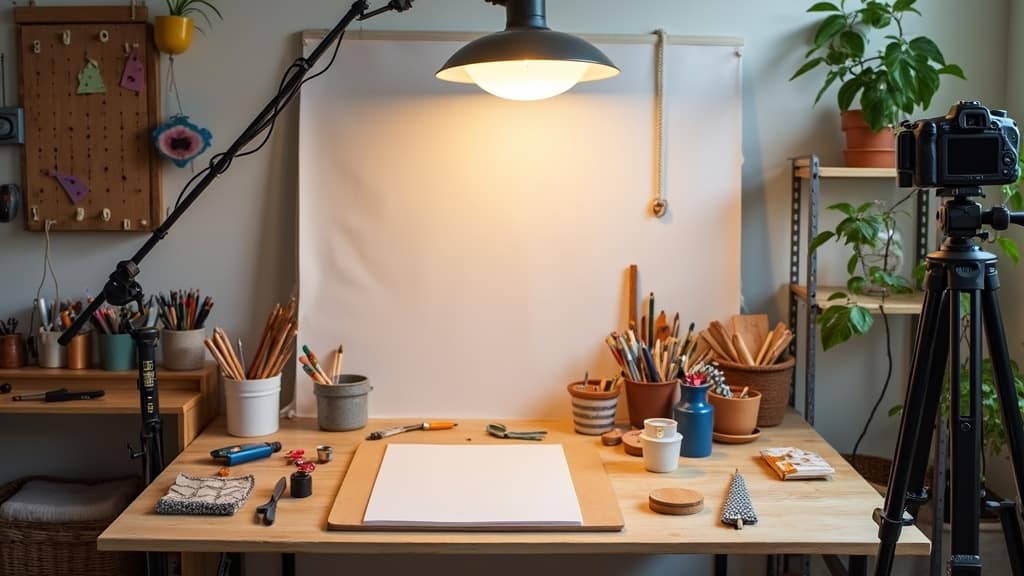
Video gear, clear instructions, and your unique perspective are all you really need to kick things off. I’ll run through some quick basics to keep in mind as you set up shop for your vlog:
- Basic Video Camera: Your smartphone is usually plenty to start. Some vloggers use dedicated cameras or webcams if they want crisper video quality.
- Good Lighting: Even the simplest DIY looks way better when viewers can see what you’re doing. Lamps, natural daylight, or cheap ring lights come in handy.
- Decent Microphone: Clear sound is super important, especially if you’re explaining steps. Lavalier mics that clip onto your shirt are budgetfriendly and effective.
- Tripod or Phone Stand: Nobody wants to watch a shaky, wobbly video of your hands at work. Hands free setups free you up to focus on the task.
- Editing App or Software: There are loads of free tools (like iMovie, DaVinci Resolve, or InShot) that let you trim, add captions, and make your videos pop.
Choose Your DIY Niche and Audience
One of the first things I did before filming anything was to think about my specialty and the people I wanted to reach. DIY covers tons of ground, such as woodworking, crafts, tech repairs, upcycling, home improvement, or ecofriendly projects. You don’t have to stick to one area forever, but building your first few videos around a focused topic helps attract viewers who share your interests.
Popular DIY YouTubers and TikTokers often start by showing their favorite type of project, like refurbishing thrift store finds, plant care tips, or organizing small spaces on a budget. I recommend browsing other DIY vlogs for inspiration and seeing what gets the most comments and shares. That way, you can spot gaps and trends but still keep your own style front and center.
Don’t worry if your interests change later. Lots of vloggers switch things up as their channels grow. But starting with a clear topic helps you stand out and create videos that get noticed by the right audience. If your passion is ecofriendly makeovers, for example, you can sprinkle in occasional new ideas while sticking to your core strengths.
Plan and Prep Your First Videos
Planning ahead can save loads of stress, even if you’re not a natural planner. Before hitting record, I like to:
- Sketch Out Your Steps: Make a quick outline or a checklist of the main things you want to show or teach in each video.
- Gather Your Materials: Lay out all the tools and materials ahead of time. Mistakes and forgetting stuff are totally normal, but it looks more professional to keep things smooth.
- Find a Quiet, Bright Spot: Natural light from a window or a couple of lamps will do the trick. Minimize background noise by filming at quieter times of day.
If you’re feeling nervous about being on camera, you’re not alone. Most of the big DIY creators I’ve chatted with admit their first dozen videos felt awkward. You can always film with just your hands and a voiceover until you’re more comfortable, or try shortform videos that focus on one specific hack.
Take time to pick project ideas that excite you. Your own interest shines through and makes a bigger impact than trying to copy someone else. Practice a few times before recording your first official video. Even a little rehearsal can make the process smoother and cut down on editing time later.
Filming DIY Projects? What Works for Viewers
DIY tutorials are a lot easier to follow with tight, clear shots and step by step instructions. Here are some tips from my own trial and error:
- Keep Shots Steady and Centered: Use a tripod or stack of books to keep your camera stable. Wide shots help set the scene, and closeups make each step clearer.
- Show Materials Clearly: Hold up each item to the camera, say its name, and give any quick tips about where to find it.
- Use Voiceovers When Needed: If background noise sneaks in or you want to add advice, record your instructions as a voiceover during editing.
- Add Captions or Step Labels: Even simple onscreen text boosts understanding for people watching on mute.
- Walk Through Mistakes: If you mess up, own it and show the fix. That’s real life DIY and makes your advice feel more doable for beginners.
Keep the video pace brisk and break tasks into manageable chunks. Jump cuts, quick closeups, and sideby side comparisons can help viewers follow along with each step. Using a mixture of wide and tight shots gives viewers all the info they need to try it for themselves. If your project takes days or has lots of drying or waiting time, consider shooting and then stitching together the process in editing.
DIY Vlog Challenges (And Quick Fixes)
Every creator runs into snags, from technical trouble to creative blocks. Here are a few super common headaches with quick fixes:
- Background Noise: A basic clip on mic or recording voiceovers helps a lot. Editing software lets you reduce background sound too.
- Lighting Issues: Bouncing light off a white wall or using two lamps on each side brightens shadows. Natural daylight is still the cheapest trick I use.
- Long Video Length: Most viewers check out if the video drags, so I trim extra chit chat and speed up repetitive tasks during editing.
- Video Upload Problems: Compress large files or adjust your export settings. Some platforms have max size limits, so quick Google searches usually help.
- Running Short on Ideas: Ask your community for video requests or check comment sections for repeated questions. Trend tracking tools like Google Trends are pretty handy for content brainstorming too.
Extra Tips for Handling Mess Ups
Even the smoothest vlogs have slip ups. I always keep an extra set of project materials nearby so I can retry without taking the whole project apart if something goes sideways. Editing out small stumbles keeps things moving, but leaving a blooper or two makes your content feel genuine.
Try to laugh off mistakes and turn them into relatable moments. Instead of getting frustrated, your audience will appreciate your honesty and perseverance. Sometimes, these real life moments help you make stronger connections with viewers and encourage people to try new things themselves, even if they’re not perfect at first.
Level Up: Advanced Tips for DIY Vloggers
Once you’ve got a few videos behind you, there are a bunch of ways to grow your channel and improve your videos:
Thumbnail Design: Eye catching thumbnails with clear visuals really help get more clicks. Simple graphics showing the finished product or a colorful step draw in curious viewers.
Consistency Matters: Posting videos on a regular schedule builds momentum. Whether it’s weekly, twice a month, or another rhythm, it’s easier for fans to find your latest stuff.
Batch Filming: If you can, shoot a few videos in one day, then edit and upload them over time. This saves a ton of setup hassle and helps keep your channel from looking deserted when life gets busy.
Collaborate With Other DIYers: Team up for a guest segment or swap shoutouts. This builds community and exposes your channel to new followers.
Optimize for Search: Good video titles, detailed descriptions, and wellresearched keywords help your DIY tips pop up in searches. Tools like TubeBuddy or vidIQ can help you tune titles and tags.
Sticking with these habits helps creators move from beginner videos to a steady flowing channel with a growing audience.
Choose the Right Equipment to Upgrade
If you want to invest a little more down the road, here are a few upgrades that give DIY vloggers the best bang for their buck:
- Mirrorless Camera or DSLR: These get you professional quality video with cool depth of field effects, which is worth it if you want seriously crisp shots.
- External Microphone: Higher end mics capture voice and subtle sounds with less background noise.
- Overhead Rigs or Mounts: These clamp above your workspace for super clear topdown shots.
- Portable Lights: LED panels or softboxes let you control brightness no matter when or where you’re filming.
Real life example: A friend of mine started vlogging with just his phone and a homemade rig built from PVC pipe. A year later, he upgraded to a secondhand camera and some LED lights, and his videos instantly looked more professional. Small upgrades over time paid off way more than blowing cash all at once.
Carefully select which upgrades are worth it for your filming style. You might prefer putting money towards better lighting instead of a new camera, especially if shadowy corners are a recurring problem. For some, audio quality matters more, so a higher quality microphone will give your content the boost it needs.
FAQ: DIY Vlogging Questions Answered
You don’t have to have all the answers, but I see these questions asked a lot by beginners:
Question: What video length is best for DIY tutorials?
Answer: Short videos (5–10 minutes) usually get more engagement. For more complex builds, split content into a series.
Question: Do I need to talk on camera?
Answer: Nope. You can use voiceovers, text overlays, or even background music if you’re not ready to show your face.
Question: How often should I upload?
Answer: Whatever fits your schedule. Once a week is great, but even twice a month works if you’re clear with viewers and stay consistent.
Question: Can I vlog with just a phone?
Answer: Absolutely. Tons of top DIYers film and edit straight from smartphones, so it’s the content that matters most.
Question: What are some easy ways to grow a new DIY channel?
Answer: Connect with fellow creators, reply to comments, and ask viewers what they want to see. Engage in online groups, use relevant hashtags, and share your vlog on social media platforms for extra reach.
Final Thoughts
Starting a DIY vlog is all about sharing your creativity, learning as you go, and building a supportive community. You don’t need a studio setup or expensive gear to make videos that teach, inspire, or help solve real problems. As you grow, paying attention to presentation, planning, and honesty with your viewers builds trust and keeps your channel thriving. Pick a niche that fires you up, record your honest take on each project, and you’ll soon have a corner of the internet to call your own. Keep experimenting and tweaking your style so that your channel reflects who you are. The more you share, the more you’ll help others jumpstart their own creativity.
The Vlog Script Assistant GPT
I specialize in scripting for vlogs, focusing on simplicity and creativity.


