Master Vlog Lighting
Vlog lighting can really make or break the vibe of your videos. If you’re looking for that clean, pro look, or just want to make sure your message comes through without weird shadows, getting your lighting right is pretty important. Picking lighting gear can be a little confusing at first, especially when you see all the options out there. I’ll break down everything you need to know to get started with great vlog lighting, plus tips and tricks to take your setup up a notch at home or on the go.
The Core Ingredients for Good Vlog Lighting
Lighting in vlogging isn’t just about making sure you’re visible, it’s also about controlling the mood and focus of your videos. Whether you’re creating beauty tutorials, daily vlogs, or tech reviews, understanding your lighting will help you feel and look more confident on camera. Over the last few years, affordable gear has made cool vlogging looks much more accessible. That’s why even beginners can nail prostyle results without spending a ton.
The right lighting helps control how your audience feels about your story. No matter your budget, it’s smart to start with the basics: soft, even, and consistent light so viewers focus on your message instead of squinting at a toobright window or shadowy face.
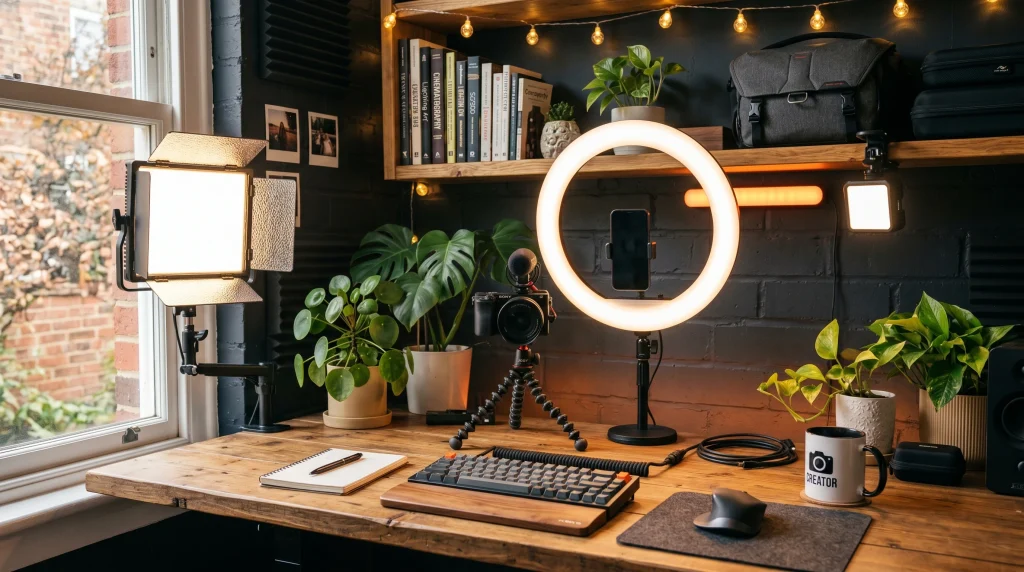
Ring lights and LED panels have become super popular because they’re lightweight, bright, and easy to move. Some creators still use traditional bulbs with softboxes, but most have moved toward LEDs for vlogging setups since they stay cool and run quietly (so no fan noise in your audio).
Lighting Basics? What Should You Know First?
Kicking things off with the right knowledge makes improving your vlogs a lot easier. Lighting terms can be tricky, so I’ll keep it real and simple. Here are a few basics you’ll want to know:
- Key Light: This is your main light source, usually aimed at your face. A softbox, ring light, or big LED panel works well in this spot.
- Fill Light: It sits on the opposite side of your key light, reducing shadows so your face doesn’t look too intense. Even a cheap desk lamp or another small LED does the trick.
- Back Light (or Hair Light): Placed behind or above you, this light separates you from your background and helps you pop on screen.
- Color Temperature: Light comes in different colors, from warm orange to cool blue. Daylight bulbs (about 5600K) look pretty natural for most vlogs.
- Brightness (LUX/Lumen): This just means how much light your equipment produces. More brightness helps in big rooms or with darker backgrounds.
These basics help you start thinking about placement and mood. Mixing up the balance of these gives you full control over how your vlogs look and feel. If you ever feel like your video has the wrong tone, try adjusting your key light or adding a fill for subtle changes.
StepbyStep Guide to Build Your Vlog Lighting Setup
Setting up your lighting doesn’t have to be stressful. Here’s a handy checklist to help you get started, whether you’re working with a phone or a fancy camera:
- Pick Your Key Light: Start with something simple—a ring light for direct, even light, or an LED panel if you want more flexibility with angle and brightness.
- Add Fill If You Need It: If one side of your face looks too dark, add a fill light. You can even bounce light off a piece of white poster board as a free fix.
- Set the Back Light: For a more polished look, add a little light behind you to highlight your hair or shoulders. LED tube lights work great and can add color if you want.
- Position Your Lights: Place your key light about one arm’s length away at eye level, aiming for soft shadows across your face.
- Adjust Color and Brightness: Match all your lights to a similar color temperature so your footage doesn’t look mismatched. Dial in the brightness so your skin isn’t washed out.
Any setup, big or small, can benefit from adjusting these basics. Tweak things until you get the look you want, and always check how your lighting comes across on camera before you start filming for real.
Things You Should Probably Think About Before Buying Lighting Gear
Lighting for vlogging comes with its own set of small challenges. Here are a few things to keep in mind as you shop or plan your setup:
- Space: Softboxes are awesome but might crowd a small room. Panels and ring lights fit tight spaces better.
- Budget: Don’t feel like you have to spend big right away. Even budget LED rings or compact panels work great for beginners.
- Portability: If you move your filming area a lot, go for batterypowered LEDs or lights with USB power so you’re not stuck near outlets.
- Power Source: Check if your chosen lights work with wall plugs, batteries, or USB. That makes a difference for setup and reliability.
- Adjustability: Swappable filters or dials to tune brightness and color temperature let you set up for different times of day or backgrounds.
Space Limitations
In tight rooms, lights can end up in your shot or cramp your setup. I try to use adjustable tripods or clampon ring lights to get around space issues. Panels that attach to your camera or laptop can save desk space too.
Budget Solutions
You can DIY soft lighting by taping a white grocery bag over a lamp (basic, but it works). Or use daylight from a window as your main light, but toss up a curtain or sheer to soften direct sunlight. As long as your face is evenly lit, you’re good to go. If you’re still feeling creative, try using foil to bounce extra light from a basic fixture. Little tricks like these can make a big difference.
Portability and Versatility
On the go vloggers really benefit from pocketsized or rechargeable lights. You can toss these in a backpack and set up wherever you need to film. That’s super useful for travel or behindthescenes vlogs. The easier it is to move your lights, the more likely you’ll experiment and find what works best for your content. Some compact options even offer color effects, making it easy to carve out your unique style.
Tips and Tricks for Awesome Vlog Lighting
Getting the most out of your lighting setup often comes down to the little things. Here are a few tricks I always use to keep my lighting looking solid:
- Use Reflectors: Bouncing light back onto your face with a cheap reflector (or even a piece of tin foil stuck to cardboard) can fix harsh shadows.
- Mix Natural and Artificial Light Carefully: If shooting near a window, match your artificial lights to daylight color (5600K) or close your curtains to avoid weird color clashing.
- Experiment with Angles: Moving your lights just a bit higher, lower, or to one side can totally change the mood. Classic YouTube beauty lighting puts your ring light right around eye level.
- Add a Pop of Color: RGB LED strips or accent lights in the background can make your videos feel more lively without overpowering your main shot.
Trying out these tweaks means you’re not locked into one look. Creating a recognizable vibe for your channel gets easier with a bit of practice. Viewers will spot the difference, and you’ll start seeing higher engagement as your visuals get cleaner.
Cool Gear Worth Checking Out for Vlog Lighting
There’s a ton of gear out there, so I’ll call out a few favorites to save you some time:
- Ring Lights: These are super popular for a reason. Easy to set up, give smooth, flattering light, and cheap options start around $20-30 USD. Neewer and UBeesize make reliable ones.
- LED Panels: Great if you want to aim or diffuse your light more. Elgato Key Lights or the Neewer 660 LED are solid picks that work well for sitdown vlogs. Most come with white and orange gels for color control.
- Cute Accent Lights: Small RGB lights, like Aputure MC or Govee RGBIC bulbs, let you get creative with backgrounds or add stylish highlights on shelves or walls.
- Portable Gear: For creators on the move, ultrasmall lights from Lume Cube or Zhiyun charge via USB and slip right in your bag.
Even if you’re just using your phone, these lights will help catch a viewer’s eye and make your content look way more polished. If you want to really stand out, use a light with adjustable color settings. This can set your channel apart from the crowd.
Frequently Asked Questions
Here are a few questions that pop up a lot about vlog lighting, just in case you’re thinking about the same things:
Question: What is the best lighting setup for beginners?
Answer: A basic ring light or LED panel just above eye level works great. Place it a bit offcenter to keep natural shadows, and use a second cheap light or reflector if you see big shadows on your face.
Question: How can I get good lighting if I have zero budget?
Answer: Use natural light from a window. Add a sheer curtain to diffuse it so it’s not harsh. You can also bounce light with white cardboard or aluminum foil. It’s all about playing with what you have.
Question: Is colored lighting good for vlogs?
Answer: Colored lighting works well in backgrounds or to set a mood, but keep your main light clean and natural so your viewers can see you clearly.
Getting vlog lighting right is mostly about finding the gear and tricks that work for your space, your style, and your budget. Tweak things, watch your old videos to see what you’d change, and as you go you’ll stumble upon your own signature look. Lighting can seem complicated at first, but once you get hands-on, it’s pretty fun to experiment and see the difference it makes. Stick with it, and soon, setting up vlog lighting will feel like second nature—and your content will only get better from here.