Live Streaming Setup On A Budget For Lifestyle Vloggers
If you’re a lifestyle vlogger who dreams of going live to share real moments with your audience, setting up a live streaming rig on a budget is totally doable. You don’t have to break the bank to get a setup that delivers good audio and video, keeps you organized, and makes streaming fun instead of stressful. I’ve worked with plenty of budget setups and learned the hard way where to save versus where to splurge, so I’m sharing what I know works best.
Budget-Friendly Streaming Gear Every Lifestyle Vlogger Needs
Streaming has gotten way more accessible over the past few years. You don’t need to sink money into a professional studio either. I find you only need a few core pieces of equipment to get started, and focusing on these first keeps your setup simple and affordable.
Understanding what matters most in your gear helps if you’re new to streaming. Video quality that’s clear, audio that isn’t echoey, and stable internet are the non-negotiables. Recent stats show that live streaming now attracts more than half of online viewers, with lifestyle content leading the way (source: Streamlabs), showing you’re in good company as a beginner.
Many vloggers feel overwhelmed by all the options, but sticking with tried and true budget solutions can save you time and money. Most creators actually started live streaming from their bedrooms, using USB mics and free streaming tools. You can do the same without letting quality slip too far.
Start Streaming? Core Components and What to Look For
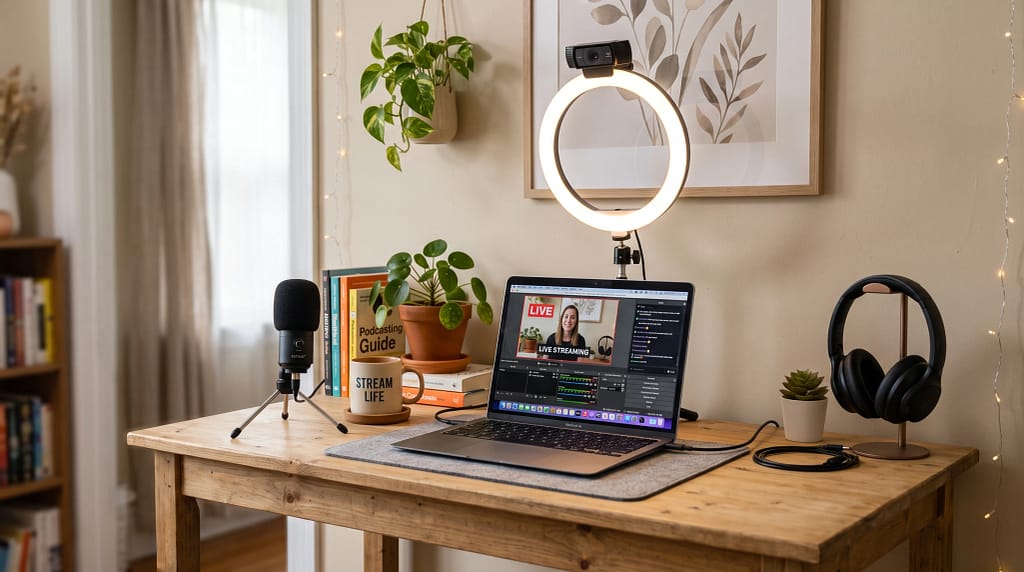
Building a solid streaming setup on a budget is not about grabbing the cheapest gear on the market, but rather choosing what fits your priorities. Here’s what you absolutely need to start, and my suggestions on where to put your money:
- Webcam: 1080p at 30fps is great if possible. The Logitech C920 is a popular choice, but almost any namebrand webcam in that range does the trick. Even a smartphone can work if you use apps like DroidCam.
- Microphone: Good audio really matters. USB condenser mics like the Fifine K669B or the Tonor USB mic are affordable and do the job for casual live streams.
- Lighting: A small ring light or even a basic LED panel instantly boosts video quality. Set it up in front of you, preferably above your webcam. Natural light works, but reliability is key for consistent streaming.
- Laptop or Desktop: Most midrange laptops from the last few years are fine for basic streaming. Make sure you have at least 8GB RAM and a decent processor (Intel i5/AMD Ryzen 5 or better) to avoid lag.
I’m always surprised by how little you need to look and sound professional. Prioritizing your mic and lighting pays off more than obsessing over cameras when you’re on a tight budget.
Your Step by Step Budget Streaming Setup Guide
Setting up for your first stream takes a bit of trial and error, but starting simple saves a lot of headaches. These are my go to steps whenever I’m building a basic vlogging setup:
- Pick Your Streaming Spot: Find a quiet, minimally cluttered space. Facing a window is great for natural light. Just avoid harsh sunlight that washes out your face.
- Plug In Your Webcam and Mic: Connect them to your computer, install any drivers if needed, and test them in your streaming software.
- Set Up Lighting: Place your ring light (or set up a lamp) behind your webcam at eye level. Check your camera preview to tweak brightness and reduce shadows.
- Choose Your Streaming Software: OBS Studio is free, open-source, and packed with features. Streamlabs Desktop is another solid free choice with a more userfriendly interface.
- Configure Your Scenes: In OBS or your chosen software, set up a basic scene with your video, audio input, and any overlays or branding you want. Keep it simple to avoid tech glitches.
- Do a Private Test Stream: Most platforms let you do private streams. Record yourself to check sound, picture quality, and if there are any lag or sync issues—before you go live.
Testing is underrated. Even experienced streamers run checks before each show. It pays off to doublecheck your gear and layout, especially if you switch up your setup.
What to Think About Before Buying Streaming Equipment?
It’s easy to get swept up in online recommendations, but every vlogger’s needs are a little different. These are the real-world things I always keep in mind before spending money:
- Audio Clarity: If your mic picks up lots of background noise or sounds tinny, your viewers will tune out fast. Try to get a mic with a cardioid pickup pattern—it helps focus on your voice, even in noisy apartments.
- Camera Quality: A decent webcam (or smartphone) makes your stream feel more personal and inviting. Use what you have, upgrade only when you’ll really notice the difference.
- Internet Stability: A wired connection is better than WiFi for uploads. If you’re on WiFi, stream during off-peak hours and check you have at least 5 Mbps upload speed.
- Comfort: You’ll be sitting for a while during streams. A supportive chair and basic desk setup are worth the small investment. Adjust your monitor or webcam to eye level—it helps with confidence and posture.
I also recommend reading product reviews or checking YouTube demo videos. A ton of streamers show these products live in action, which really gives you a clearer view before buying.
Audio Tips for Compact and Noisy Spaces
Living in small apartments or shared spaces brings unique challenges. I’ve managed streams right beside busy streets, so here’s what usually helps:
- Hang up blankets or foam panels to dampen echo if you don’t have much furniture.
- Stream late mornings or early afternoons when housemates or neighbors are quietest.
- Mute your mic when not talking and use push to talk features if available.
- Test with headphones on so you can catch buzzing or hissing noises before your viewers do.
Best Free and Cheap Streaming Tools
Most vloggers think fancy streaming means expensive software, but you can get super far with free or cheap options. Here are some of my top picks:
- OBS Studio: Free, open-source, works on Windows, Mac, and Linux. Supports scenes, overlays, and advanced audio.
- Streamlabs Desktop: Also free, with built in chat, alerts, and scene templates. Great integration with Twitch and YouTube.
- Voicemeeter Banana: Free virtual mixer for advanced audio controls if you want to bring in music or other sources.
- Canva: The free tier is great for making overlays, intermission screens, and easy onbrand graphics without special graphic design skills.
If you want to move up with more production value, you can always upgrade software or try paid plugins, but these free tools really get the job done when you start out.
Eye-Catching Features and Small Upgrades When You Have a Little Extra Budget
After you’ve streamed a few times and know you’ll stick with it, there are some affordable upgrades and cool features that make streaming more fun and unique:
- Stream Deck Mini: This is a programmable keypad that lets you swap scenes, cue music, and interact with your chat with just a push. Not necessary, but really convenient if you’re streaming often.
- External Webcam Mount: A flexible tripod allows you to try out new angles and get creative with your shots. Smartphone tripod adapters are affordable and easy to track down.
- LED Accent Lighting: Colored LEDs can set the mood and help your space stand out visually for just a small cost.
- Basic Green Screen: For just a few dollars, hang up a green sheet and use OBS’s chroma key tool to swap out your background—a lifesaver if your room’s messy.
Start simple, use what you have, and add on as your community and confidence grow. This way, every dollar works harder for you.
Frequently Asked Questions?
Plenty of new lifestyle vloggers have the same questions when they’re starting with streaming. Here’s what I get asked:
Question: What’s the cheapest way to start live streaming for vlogs?
Answer: Use your existing laptop, a free streaming app, and whatever webcam or even phone you already own. Upgrade your mic and snag a basic ring light when you can.
Question: Can I use my smartphone for everything?
Answer: Absolutely! Apps like Streamlabs Mobile let you go live straight from your phone. Pair it with a simple tripod and a clipon mic for even better quality without breaking the bank.
Question: My internet isn’t great—can I still stream?
Answer: Yes, but stream at a lower resolution, like 720p, and close background apps. Try scheduling your streams for offpeak hours to reduce lag.
Why Gear Choice Makes Streaming Smoother?
Picking the right equipment for your live streaming setup helps you make smoother, more consistent vlogs. When your viewers hear you easily, see you clearly, and enjoy a well lit, organized stream, you build a stronger connection. That’s why I always suggest starting with audio and lighting upgrades, then moving on to small extras that add style once your skills and confidence grow.
Getting started on a budget is not limiting at all; it keeps things simple and stress free. The easier it is for you to stream, the more you can focus on sharing your story and building a community. By leveling up bit by bit, you’ll look back and be glad you started without waiting for perfect gear. Happy streaming!